
How to Plant Bulbs - Spring & Summer Bulbs
- Posted on
- By Stephanie Dickerson
- Posted in How To, spring gardening
- 0
Bulbs are bundles of flower power that take weeks, sometimes months, to bloom, but wow are they worth it. We realized with the arrival of these bulbs of joy, that not everyone will know how to plant them! Here's everything you need to know about bulbs.
We've recently received our bulbs, and we couldn't be more excited! Bulbs are bundles of flower power that take weeks, sometimes months, to bloom, but wow are they worth it. We realized with the arrival of these bulbs of joy, that not everyone will know how to plant them! Here's everything you need to know about bulbs.
Types of Bulbs
Spring Bulbs
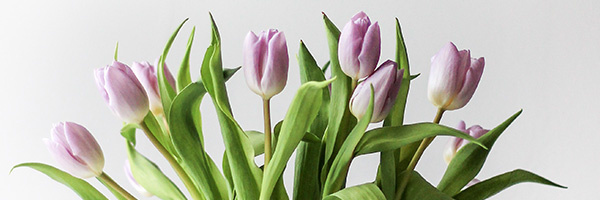
There's two main types of bulbs, spring and summer. Spring bulbs, also called hardy bulbs, are planted in the fall, snuggle in the ground all winter, and flower in the spring. Some of the more common spring bulbs are tulips, irises, daffodils, hyacinth, allium, and crocus. These bulbs need several weeks of cold temperatures to break their dormancy and flower to their full potential.
Summer Bulbs
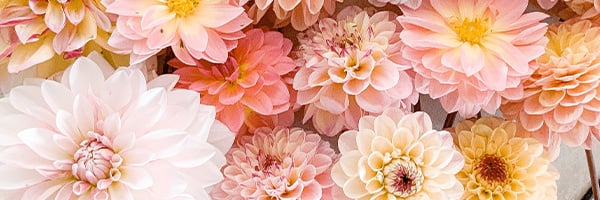
Summer bulbs are also called tender bulbs, and are planted in the spring and flower in the summer. Gladiolus, lilies, caladiums, and elephant ears are common examples of a summer bulb. Some will bloom later in the summer or for a longer time, like dahlias that bloom into fall. Summer bulbs aren't tolerant of cold temperatures and should only be planted after the ground warms up, and there's no longer a threat of frost. If you bring yours home before planting time, store them in a cool, dry spot until the ground is warm enough.
The Planting Particulars
Whether you are planting spring or summer bulbs, there's some common planting requirements between them. Determine the planting depth for the type of bulb you’re planting. If planted too deep, flowers will bloom late or not at all. If planted too shallow, new growth may become exposed too soon and risk damage by cold temperatures. If you are unsure of the exact planting depth, a good general rule of thumb is to plant the bulb 2 to 3 times as deep as the bulb is tall.
Prepare the soil by loosening and mixing in organic material if needed for added nutrients or to improve drainage. Special bulb fertilizer can be added; follow the package directions.
Place the bulbs with the pointy-end up and with the roots down. If you’re not sure of the top or bottom of the bulb, plant it on its side and it will find its way to the surface. Cover with soil and a light layer of mulch. Newly planted bulbs should be watered well to get settled in.
If needed, protect bulbs from critters by staking down wire mesh or chicken wire over the beds or planting them in bulb baskets or wire cages.
Where to Plant Bulbs
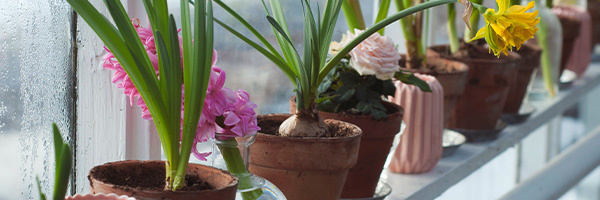
As long as you ensure that your bulbs have good drainage and sunlight, you can plant them just about anywhere. Drainage is critical to keep bulbs from rotting. They like loamy and slightly sandy soil because it provides the drainage and the nutrients they need. Early spring bloomers can be planted under deciduous trees where they'll get enough sun to bloom before the tree's leaves block out the light. However, they will only bloom well in the first year, as they'll need sunlight later in the season for the leaves to gather enough energy for next year's flowers.
Lasagna Planting
Not only good for Sunday dinner, lasagna (planting) is great for bulbs. The idea is to plant bulbs with different sizes and staggered bloom times in layers for a continual bloom. This works great in large containers that are deep and wide enough. Here’s a sample plan, working from the bottom up in a container:
- A good layer of potting soil for a planting depth of about 8 inches
- A few late-spring-blooming bulbs such as daffodils or tulips
- Another layer of potting soil for a planting depth of about 6 inches
- Add mid-spring-blooming bulbs such as more tulips or hyacinth
- Another layer of potting soil for a planting depth of about 4 inches
- Add early-blooming bulbs such as galanthus, scilla, muscari or crocus
- Another layer of potting soil for a planting depth of about 2 inches
- Add more early-blooming bulbs such as freesia or anemones
- Top with more potting soil and a thin layer of mulch
- Overplant with pansies, heuchera, hardy cyclamen or dusty miller if you’d like a filler while waiting for the bulbs to grow.
This planting method can be used in-ground as well for a concentrated area planting. It can also be adjusted to fewer layers in smaller pots.
Summer Bulb Specific Planting
Provide regular water, allowing soil to dry out between watering. Some plants, such as Crocosmia, are adaptable to drier conditions, while others such as elephant ears thrive with lots of moisture. Summer-blooming bulbs are planted in spring. Wait until conditions are warm enough to plant bulbs outdoors, as bulbs can rot if soil is too cool. Soil temperature should be at least 60 degrees or higher.
Overwintering Summer Bulbs
- For bulbs that need to be dug up: Many summer bulbs can be saved for the following growing season by overwintering indoors. Wait until the first hard frost kills the leaves before digging. Remove excess soil and cut back dead foliage. Place bulbs in peat moss or wood shavings in an open paper bag or ventilated container. Store in a cool, dry place such as a basement or heated garage in temperatures 40 degrees to 60 degrees F. Discard bulbs that become mushy or smell bad due to rotting.
- For bulbs that remain in the ground: Mulch over the bulbs with several inches of leaves, straw, or pine needles to insulate from colder temperatures.
- For bulbs in containers: Bulbs planted in containers can be left in the pot and moved indoors until the following spring.
Spring Bulbs Specific Planting
Water deeply after planting and again before the ground freezes. When bulbs first show growth in spring, resume watering once a week or so if there hasn’t been measurable rain. Avoid overwatering to prevent bulb rot. Bulbs planted in containers dry out more quickly, so will need to be watered more often. Keep soil moist until bulbs die back completely.
When plants are finished flowering, allow the foliage to die back naturally, which allows energy to be stored in the bulb for the next year’s growth. Plant bulbs alongside perennials such as hosta that will grow up to hide the unsightly bulb foliage. Clean up spent foliage once it’s turned completely brown. Bulbs may become overcrowded, which can inhibit flowering. Divide every few years as needed. Once bulbs go dormant, they can be dug up, divided and replanted with proper spacing.
In colder climates (USDA Zones 1-4), plant bulbs in September or October before the first hard frost. For warmer regions (Zones 5-8), wait until the weather has cooled off to plant in October or early November. In zones 9-11, treat bulbs as annuals. Pre-chill bulbs for 12 to 16 weeks and plant in spring.
After Care & Digging Up Bulbs
For all bulbs, after blooming, cut only the flower stem back. Leave foliage intact until it turns yellow and wilts to the ground; the leaves are gathering and storing energy for next year. If the foliage is cut back too soon, bulbs may not perform well—or at all—the following year.
Spring bulbs: In warmer climates bulbs that require chilling can be dug up and stored until pre-chilling time the following fall. For colder climates, they can stay in the ground. Many will multiply and return year after year.
Summer bulbs: In warmer climates, bulbs can be left in the ground with a layer of mulch in winter to protect and insulate them. In colder climates, they'll need to be dug up and stored until the following spring.
Digging Up Bulbs
Cut any remaining stems and foliage back to a couple of inches above the soil level. Loosen the soil around the bulbs carefully and remove them. Shake as much soil as possible from the bulb and roots. Spread them out on newspaper in a cool, shady place and allow them to dry for a few days. Make sure they are out of reach of animals and children as some bulbs are poisonous. Store in an aerated paper or mesh bag or cardboard box with holes. You can add slightly damp vermiculite or perlite so they don’t dry out too much. Store in a cool, dark, and dry location with temperatures 50 to 60 degrees, such as a basement or garage. Make sure you check bulbs monthly for any signs of mold or rot.
Droplets Of Knowledge
Don't store fruit, especially apples, or vegetables in the same refrigerator at the same time that the bulbs are being stored or pre-chilled. They emit an ethylene gas that can kill the plant inside the bulb.
Plant bulbs in the same season they are purchased, they won’t last until next year.
If bulbs are to be left in the ground while dormant, place a marker so that you remember where they are after you’ve cut the foliage back.
Bulbs need to breathe, so store them in aerated paper or mesh bags, never in plastic.
Here are a few tips to help you pick the best bulbs:
Bulbs should feel firm to the touch, not soft or spongy.
Choose bulbs that don’t have any signs of disease, mold, or severe damage.
At the time of purchase, bulbs should show little or no root growth or sprouting. Lilies are an exception, as they often have fleshy roots attached.
Comments
Be the first to comment...